There has been something of an out break of Rally Nostalgia at Wythall Radio Club recently. (it’s that time of year) so how timely that David G7IBO should dive back in time and recall his rally experiences.
Confessions of A Rally Addict by G7IBO

In 1990 I was just a naïve young lad, vulnerable to the seductive pull of RF of which I knew nothing. And there was nowhere more suffused with it than the local Radio Rally!
My ‘friend’ Ellis (GM4GZW) introduced me to my first hit. “Come to a radio rally near Glasgow (Ervine actually)” he said, “but beware that we’ll be there all day”. I wasn’t sure if I’d enjoy it or more likely get totally bored but…. YOU COULDN’T DRAG ME AWAY!
I’d discovered what I’d been missing in life: technology that I didn’t know existed; affordable stuff that I could buy and tinker with; rigs that I could drool over (but never be able to buy!). I was like a kid in a sweet shop. And that was it for me. One little taste and I was hooked.
Unfortunately, living in Edinburgh, the Rally calendar was pretty sparse. The few that took place were small / medium affairs and didn’t really satisfy my craving. I was informed that to get to the good stuff required more time and commitment. The first outing with ‘the boys’ was Blackpool. It was a good few hours drive but I was getting desperate for a fix.
It did not disappoint. They had everything! I bought my first ‘Wessy’ (Pye Westminster) and spent many hours fiddling and learning, buying the relevant crystals, tuning it up, putting in a preamp etc but eventually the high wore off and I needed something more.
Elvastan Castle is the stuff of legend. It was the best rally ever – so good in fact that four of us travelled from Edinburgh, spent the night at a Travelodge and the next day in Ham ecstasy. It took place in a field, three main tents (huge), and a number of other small ones. The flea market was never ending and everywhere you looked there were dealers pushing their wares. I think that was my last really long trip (~550 miles) but it shows how much of a junkie I had become
Ellis (GM4GZW) and Azeem (GM8KWQ) who were still making the trip from Scotland!
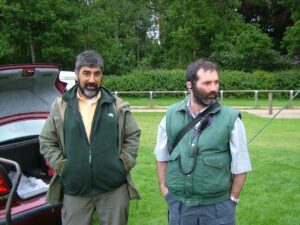
I moved to deepest Englandshire in 1992 and discovered that the Midlands is at the centre of all that is Rally related. Just about all of the major rallies are within 2 hours drive.A one off rally was the MARS rally at Alderbrook School in 2006. (See below right)

I could never understand why this was never repeated. It is just at the bottom of my road – I could have walked! But I didn’t. And it wasn’t bad!!
But then I discovered Wythall. It was many years before I joined the club but I was certainly a devoted attendee at the rallies. I remember the tent between the huts, the mud bath parking, the move to Woodrush school. And I remember the park and ride – I wonder which member was driving the minibus???
I always thought that this was a great rally. I have many mementoes sitting on my shelves. And it was so close too.
Wythall became one of my annual go-to events but there were a number of others. Some of them moved location over the years. The Leicester Amateur Radio Show was in Granby Halls in Leicester when I first sampled its delights. Granby Halls – what a dive –but an interesting rally. It moved to Donnington Park in 1998 and stayed for 10 years. It consisted of one huge hall with a few flea market bits outside. It reminded me a bit of the hall at the National Hamfest. Unfortunately after moving to Loughborough University in 2009 (which I missed) it disappeared into the mists of time.
Another rally which has seen a number of venues is the excellent Telford Rally. When I first went to this it was housed in a large sports hall. I will forever remember my trip there in 1997. I switched on radio 2 as I was heading along the M54 and was greeted with strange sombre church music, not at all what I expected. The cause as I’m sure many will remember was the announcement of the Death of Lady Diana Spencer. We had a moment of silence in the Rally hall, respected by all, and remembered by all who attended I am sure.
From the year 2000 it was then housed at RAF Cosford (for the next 5 years). It was great to be able to be distracted by the large jet fighters surrounding the vendors and provided an added dimension to the whole experience. I was sad to hear that they were leaving and I must say I did not like its new home at the Midlands Showground out near Shrewsbury. A poor venue and it seemed like a real hike to get there. Fortunately, the next year saw a move to ‘Enginuity’ (Ironbridge) which was a much more interesting place, and this excursion lasted 16 years. It again offered alternative entertainment to the actual rally (my addiction must be waning – I actually went round the museum once – but then the rally had probably finished). It recently moved again to Harper Adams University near Newport. This is a good venue and it is still one of the good rallies to attend.
The Rugby Rally has had a couple of moves over the years but it seems to have settled at Princethorpe College and is one of the best ‘outdoor’ rallies but don’t expect any of the major retailers. It’s like a smaller version of the Newbury rally – great for the rummagers amongst us.
As I’m getting older I find that much of the old technology that I used to drool over in my youth has become more available. And then some has become unavailable again when the collectors start to move in. I used to be able to pick up a BEEB (BBC micro computer) for a tenner at one time!
The National Vintage Communications Fair (or RetroTechUK as it now known) is a great place for nostalgia. Plenty of old gadgets – some even older than me! This has some ham gear but is much more diverse than most rallies.
The Milton Keynes Rally has moved around a bit but the venue now has a mixture of indoor and outdoor stalls. The indoor bit doesn’t thrill me much but there is plenty in the field. And after the rally it’s off to Bletchley Park for the wife and I. If you are a member of the RSGB you can download a voucher and get in for free so it’s a no brainer really. For those who want to see the vintage computing museum (well worth it) you will have to pay though. It really hits the spot for those of us who have tinkered with computers since the 80’s.
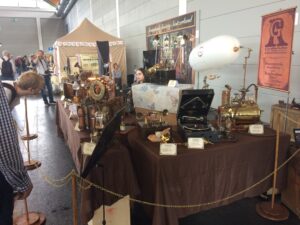
There are two pilgrimages for the rally junkie. One is the Dayton Hamvention in Ohio which is on my bucket list. The other is Friedrichshafen. Both are three day events and are massive. This is just one of the four main halls and there are talks and auctions and other special events. There was a steampunk gathering when I was there (2017) which I found particularly fun.
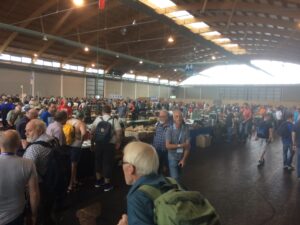
The Main Halls at the Famous Friedrichshafen Rally in Germany: David and Juliet (and probably Ian M0IDR) are in there somewhere!
And you never know who you will meet! It’s a small world! Jamie M0SDV with Juliet M6RSC (below right)

Lake Constance is beautiful. There are boat trips all around to see the sights, museums, Zeppelins in the sky, and it would be a fantastic place to just go for a holiday. The addition of a rally with every ham related item you could dream of (including many things you don’t see in the UK) makes it one of the essentials.

We were surprised to meet Jamie (2E0SDV) in Germany but I am never surprised to meet the only other ardent rally goer in the club. Ian (M0IDR) seems to be similarly afflicted to me. I am not surprised that his garage is rumoured to overflow with old radio gear. You just keep finding bargains!
I could go on and on (you already have I hear you say) about the various rallies but this ramble would not be complete if I didn’t mention the National Hamfest. This has been a fantastic addition to the rally calendar. It is huge, and has just the right mixture of dealers and junk. There is something there for everyone and its definitely one not to miss. It is unique in the UK in that it lasts 2 days. It takes me 1½ hours to drive there, but I still make the trip on both Friday and Saturday. Real hard core rallying on the Friday but I take Juliet, my wife (M6RSC), on Saturday for a gentler saunter. I was devastated to hear that this year’s excitement was not to be. But it will be back!
Unfortunately, many of the rallies that kept me satiated have ceased to be (including our own). There has always been some coming and going of rallies over the years but the pandemic really did for us. I hope that it recovers but I worry that the growth of the online auction sites has made life too easy for us gatherers of junk. It is much easier to obtain that special item that you have been looking for for years but I still prefer that rush when you find your long searched for treasure in a box under a table marked £1.
David G7IBO
The G7IBO Rally Curriculum Vitae in Full !
National Hamfest Newark, Elvastan Castle, Drayton Manor, Wythall, Rugby, Junction 28 Alfreton, Milton Keynes, Derby, Black Country, Leicester Amateur Radio Show, TelfordNEC (RSGB & Vintage radio) ? 90’s, Hack Green Secret Nuclear Bunker, Brighton and Hove, Newhaven Fort, Galashiels, Cockenzie & Port Seton, Blackpool, Wakefield, Lancaster University, Newbury, Kempton Park, Dunstable Downs (Luton) Andover, Harwell-Didcot, McMichael Rally Reading
Wherever next??!!




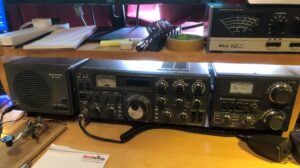
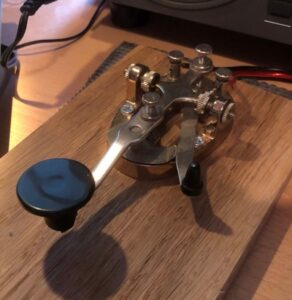 Practising with this key I found I preferred its feel to my Hi-Mound HK702 key. Perhaps I now had the right gear to do something about my long held ambition. Being of an older generation I have a real empathy with real knobs and switches, touch screens and the endless menu options of modern rigs has just never appealed to me. Fat arthritic fingers have never been best tools to use on touch screens.
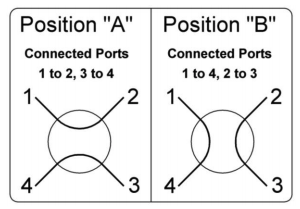
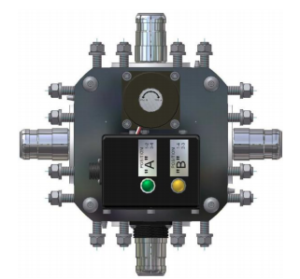
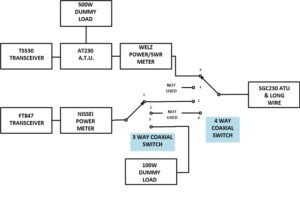
 Having only one antenna and no wish to erect a second one, the problem to be solved now was how to connect a second radio up to it. At first I looked for a coaxial transfer switch as shown in the schematic below. As the switch is turned through 90 degrees , Tx 1 port is disconnected from the antenna port and connected to a dummy load port. At the same time Tx 2 port is disconnected from the dummy load port and connected to the antenna port: foolproof and ensures each transmitter is connected to an antenna or a dummy load, thus avoiding transmitting into an open circuit. Such transfer switches are common in commercial broadcasting or communication systems but are very expensive, so that wasn’t an option.
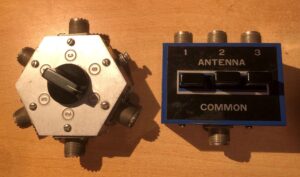
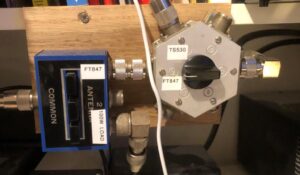
 Looking through my junk boxes I found a couple of coaxial switches which might provide a cheap solution. One was a 4 way coaxial switch and the other a three way coaxial switch (see PHOTO below)
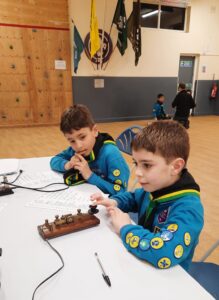
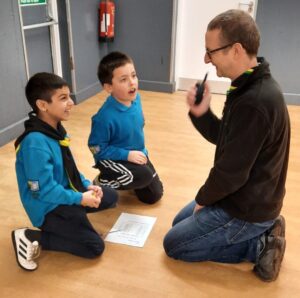
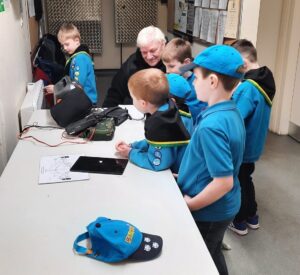 Beaver Scouts from Wythall chatted with radio amateurs on the west coast of the USA during their communications evening.
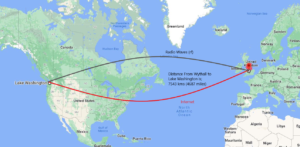
 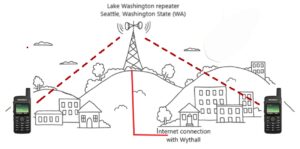 The QSOs were hosted by Les 2E0LRV from Wythall Radio Club (photo left). He used a Yeasu FT8800 mobile radio with a patch lead as an antenna into an All Star node tethered to his mobile phone, using the phone data to connect to the internet.

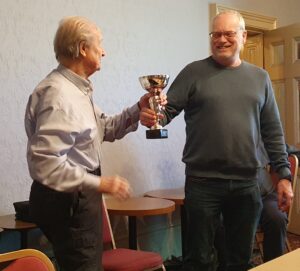 In the all-modes and bands section, Don G0NES retained the Reg Brown G7OBO Trophy helped by picking up all the band, operating and mode bonus points (left, receiving trophy from Mike G4VPD, Club President).
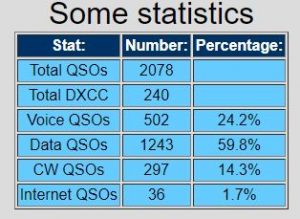 SSB-only Tim M0URX achieved an impressive 142 countries.
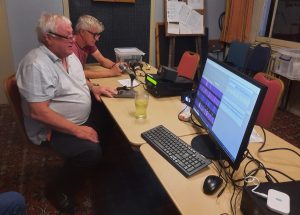
 A cold misty mid-December afternoon.. an undisclosed destination on the fringes of South Birmingham (a safe house?). Three mature males from Wythall Radio Club stagger their arrivals (to avoid suspicion?) and are ushered into a radio operating room the likes of which this scribe (John M6KET) has never experienced before. **
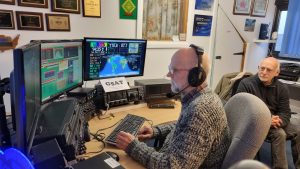
 Yes, it was the second day of the ARRL 10m SSB/ CW contest and Lee G0MTN had kindly invited Chris G3YHF, Clive M7OCB and John M6KET into his beautifully designed ‘shack’ to operate the specially allocated call G5AT, celebrating the first European Amateur contact with the USA back in 1922.
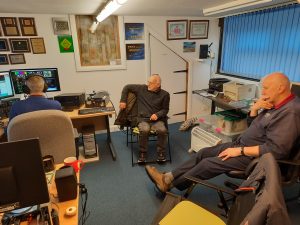 Clive was soon into the action with SSB and when both John and Clive faltered in the white hot heat of contest pressure Lee was on hand to keyboard us out of panic from a back seat!!
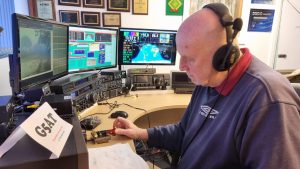 On one occasion scrambling for his usual pencil and paper on the desk in front of him, John was surprised and spooked to hear his contest CW QSO completed with his hands nowhere near the key- magic indeed.
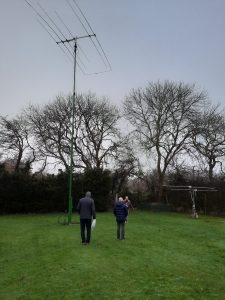 The beam and power obviously helped but the legerdemain of the operator’s fingers on the keyboard is impressive (particularly if you are a one finger keyboard typist!). One can only imagine the levels of concentration and endurance required when operating a full contest over 36/48 hours.
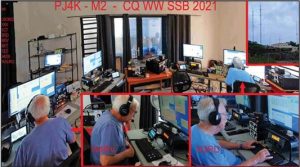 Two men approach Wythall House early on a cold misty late November evening. About their persons they carry equipment that would fool the most vigilant security, reports John M6KET.
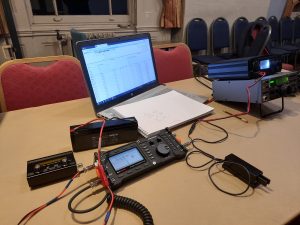 Yes, Tuesday night saw the Wythall Radio Club QRP night, an event that would bring to a close eight days of QRP operating to see: ‘How Low You Could Go’.
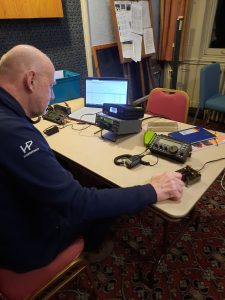
 TX5N – where’s that?